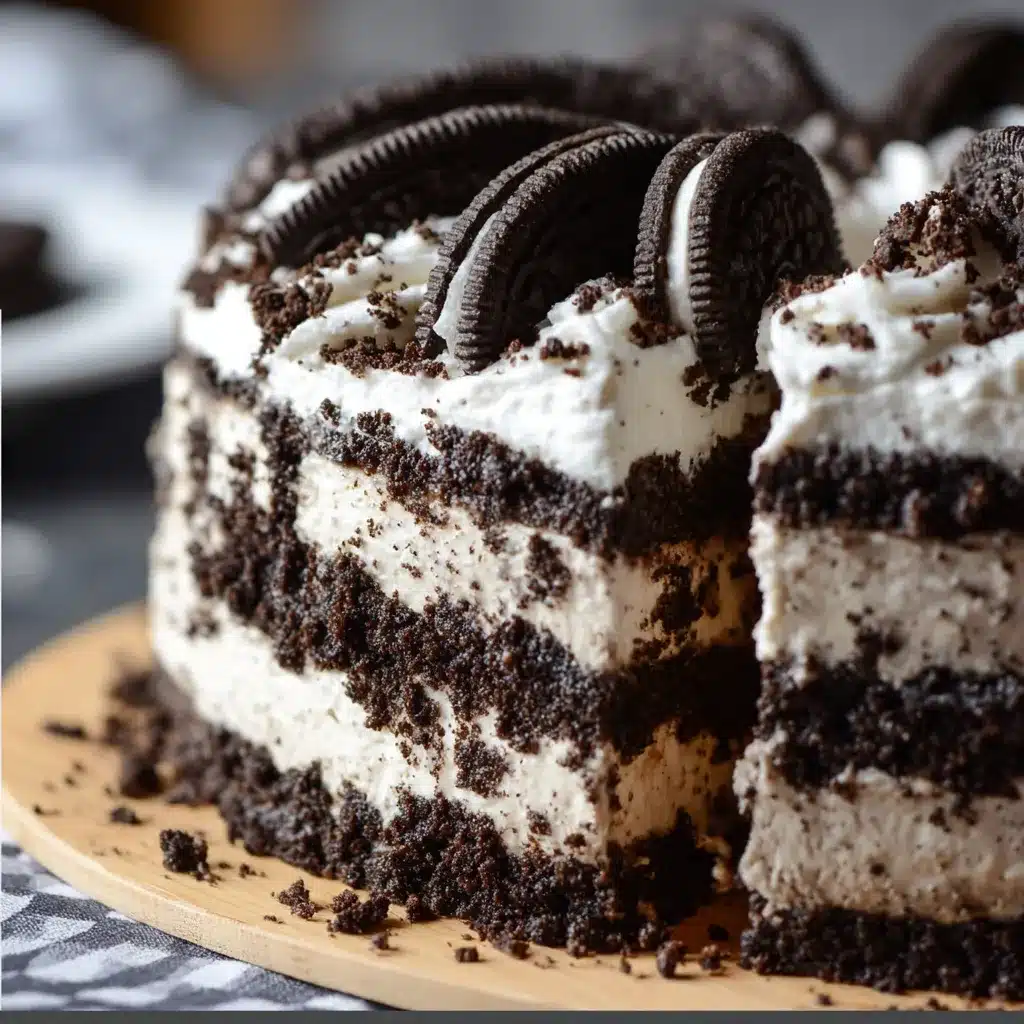
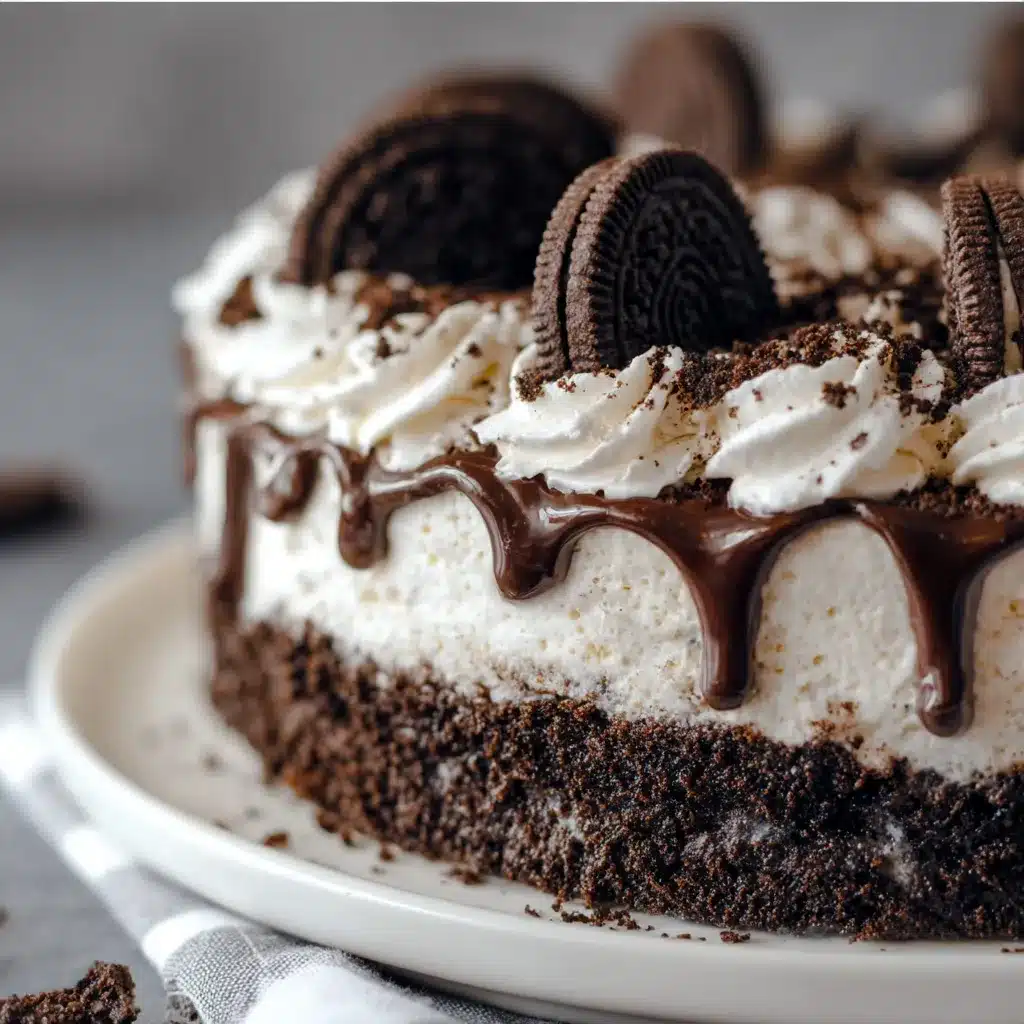
If there’s ever been a dessert that feels like pure joy in every bite, it’s this No-Bake Oreo Cake. With its layers of crushed cookies, fluffy cream cheese filling, and light-as-air whipped cream, it’s the kind of treat that makes everyone ask for seconds. I first made this recipe on a chilly afternoon when I didn’t feel like turning on the oven, and it’s been a family favorite ever since. It’s indulgent yet incredibly easy — a perfect make-ahead dessert that looks as good as it tastes. Whether you’re celebrating something special or just craving a little sweetness, this no-bake beauty is guaranteed to impress.
Why You’ll Love This Recipe
Rich and Fudgy Texture
What makes this No-Bake Oreo Cake so irresistible is the contrast of textures. The crushed Oreo crust forms a chewy, cookie-crumb base that perfectly supports the velvety smooth cream cheese filling. The whipped cream adds a light, cloud-like texture that balances every bite. It’s rich, creamy, and a little nostalgic — like dunking Oreos in cold milk but turned into a slice of heaven.
Recipes like Live Well Bake Often and The Pioneer Woman also celebrate this dreamy texture, reminding us that no-bake desserts can be just as decadent as baked ones. And as Sugar & Sparrow puts it, every bite brings that “milk-dunked Oreo” nostalgia to life — a perfect mix of comfort and indulgence.
Simple Ingredients
The beauty of this dessert is in its simplicity. You don’t need fancy tools or specialty ingredients — just a handful of everyday staples you probably already have in your kitchen.
-
Oreos bring that unmistakable cookies-and-cream flavor.
-
Heavy cream adds fluff and structure.
-
Powdered sugar sweetens and stabilizes.
-
Butter binds the crust.
-
Cream cheese adds tang and richness.
-
Sweetened condensed milk delivers a creamy sweetness.
-
Vanilla extract enhances every flavor note.
As noted by Sugar & Sparrow, many no-bake Oreo desserts come together with just four to six simple ingredients — proof that amazing desserts don’t have to be complicated.
Ease of Preparation
This No-Bake Oreo Cake is every home baker’s dream — there’s no oven required, just a little mixing, layering, and chilling. The process is straightforward and stress-free, making it perfect even for beginners. You simply mix crushed Oreos with melted butter for the crust, beat the cream cheese and sweetened condensed milk for the filling, fold in the whipped cream, and let the fridge do all the magic.
This method comes from the old-fashioned icebox cake tradition — a beloved no-bake dessert style where layers of cookies and cream set in the refrigerator to perfection (Wikipedia). In total, you’ll spend only 20 minutes prepping, then let it chill for at least 4 hours (or overnight) for a perfectly set, silky finish.
Customizability
One of the most delightful things about this recipe is how flexible it is. You can easily make it your own — swap classic Oreos for Golden, Mint, or even Birthday Cake flavors for a fun twist. Stir in peanut butter chips or drizzle chocolate ganache on top for an extra treat. For those with dietary needs, opt for gluten-free cookies or dairy-free cream alternatives.
As The Busy Baker points out, the possibilities for no-bake Oreo desserts are endless. That’s the beauty of it — once you master the base, you can personalize it to suit any craving or occasion.
Ingredients
Full List of Ingredients
Here’s everything you’ll need to make your No-Bake Oreo Cake, along with how each ingredient works its magic:
-
36 Oreo cookies (crushed): Forms the chewy, chocolatey crust and gives that classic cookies-and-cream crunch.
-
2 cups heavy whipping cream: Whips up light and fluffy, creating the smooth body of the filling.
-
½ cup powdered sugar: Sweetens the whipped cream and helps it hold its shape.
-
¼ cup unsalted butter (melted): Binds the crushed Oreos into a cohesive crust that holds its form when sliced.
-
1 teaspoon vanilla extract: Adds a subtle warmth and depth to balance the sweetness.
-
8 ounces cream cheese (softened): Brings creamy tang and structure to the filling.
-
½ cup sweetened condensed milk: Infuses the filling with silky richness and a touch of caramel-like sweetness.
-
1 cup crushed Oreos (for filling): Adds delightful bits of cookie texture inside the creamy layer.
-
½ cup mini Oreos (for garnish): The final touch — a playful, eye-catching decoration that adds crunch and charm.
Each ingredient plays its part in creating that perfect balance — rich yet airy, sweet yet slightly tangy, creamy yet crisp. Together, they make a dessert that feels indulgent but comes together with effortless ease.
How to Make No-Bake Oreo Cake
Step-by-Step Instructions
Making this No-Bake Oreo Cake is a total breeze — no oven, no stress, and no fancy techniques required. Just a few bowls, a mixer, and a bit of chill time. Follow these easy steps and you’ll have a creamy, cookies-and-cream masterpiece ready to impress.
1. Prepare the Crust
Start by crushing 36 Oreo cookies until they’re fine crumbs. You can do this using a food processor or by placing them in a zip-top bag and gently pounding them with a rolling pin — a fun stress-reliever!
Pour in ¼ cup of melted unsalted butter, mixing until the crumbs are evenly moistened and resemble damp sand. This butter-and-cookie blend will hold together beautifully to form the crust.
Press the mixture firmly into the bottom of a springform pan (about 8 or 9 inches wide). Use the bottom of a glass or measuring cup to smooth and compact the crust evenly. A uniform crust helps your cake hold its shape later.
Pop it into the fridge for 15 minutes to chill and set. Chilling solidifies the butter, giving you a firm base that won’t crumble when sliced — an essential step for that picture-perfect foundation.
Tip: Line the bottom of your pan with parchment paper for effortless removal once your cake is set.
2. Make the Whipped-Cream Base
In a large, chilled mixing bowl, pour 2 cups of heavy whipping cream. Add ½ cup powdered sugar and 1 teaspoon vanilla extract.
Using an electric mixer, whip the mixture on medium-high speed until stiff peaks form — this means the cream holds its shape when you lift the beaters. The colder your cream and bowl, the faster it will whip and the fluffier it will be.
This airy whipped cream will later lighten the cream-cheese filling, giving your dessert that melt-in-your-mouth texture.
Tip: Avoid over-beating! If your cream starts to look grainy, you’ve gone too far. Stop when it’s soft but stable.
3. Create the Cream-Cheese Filling
In another large bowl, beat 8 oz of softened cream cheese until smooth and lump-free. Room-temperature cream cheese is key here — it ensures a silky filling without any tiny clumps.
Add ½ cup sweetened condensed milk, mixing until creamy and well blended. The condensed milk adds a luscious sweetness and that signature velvety texture that no-bake cakes are famous for.
Scrape down the sides of the bowl as you go — a simple step that keeps everything consistent.
4. Fold the Whipped Cream into the Cream-Cheese Mixture
Now comes the fun part: combining the two.
Using a spatula, gently fold the whipped cream into the cream-cheese mixture in two or three additions. Take your time — you want to preserve as much of the airiness from the whipped cream as possible.
Once fully incorporated, stir in 1 cup of crushed Oreos to add delightful cookie bits throughout the creamy filling. These tiny bursts of crunch make every bite more exciting.
Tip: Always fold, never stir vigorously. Gentle folding keeps the filling light and fluffy.
5. Assemble the Cake
Remove your crust from the fridge. Pour the Oreo-studded cream filling evenly over the crust, smoothing the top with a spatula or offset knife for a clean finish.
Tap the pan lightly on the counter to release any air bubbles and ensure the filling settles evenly. The surface should look smooth and glossy — it’s already gorgeous, but just wait until it sets!
Tip: If you want neat edges when unmolding later, run a clean knife around the inside edge of the pan before chilling.
6. Chill
Transfer the assembled cake to the refrigerator and let it chill for at least 4 hours, though overnight is even better.
Chilling is what transforms this mixture from creamy to sliceable perfection. It allows the butter in the crust to firm up and the cream-cheese filling to stabilize. During this time, all the flavors meld beautifully, creating that irresistible “cookies-and-cream” harmony.
Resist the temptation to dig in early — patience pays off here!
7. Garnish & Serve
Before serving, remove the cake from the pan. If it sticks slightly, run a warm knife along the sides for a clean release.
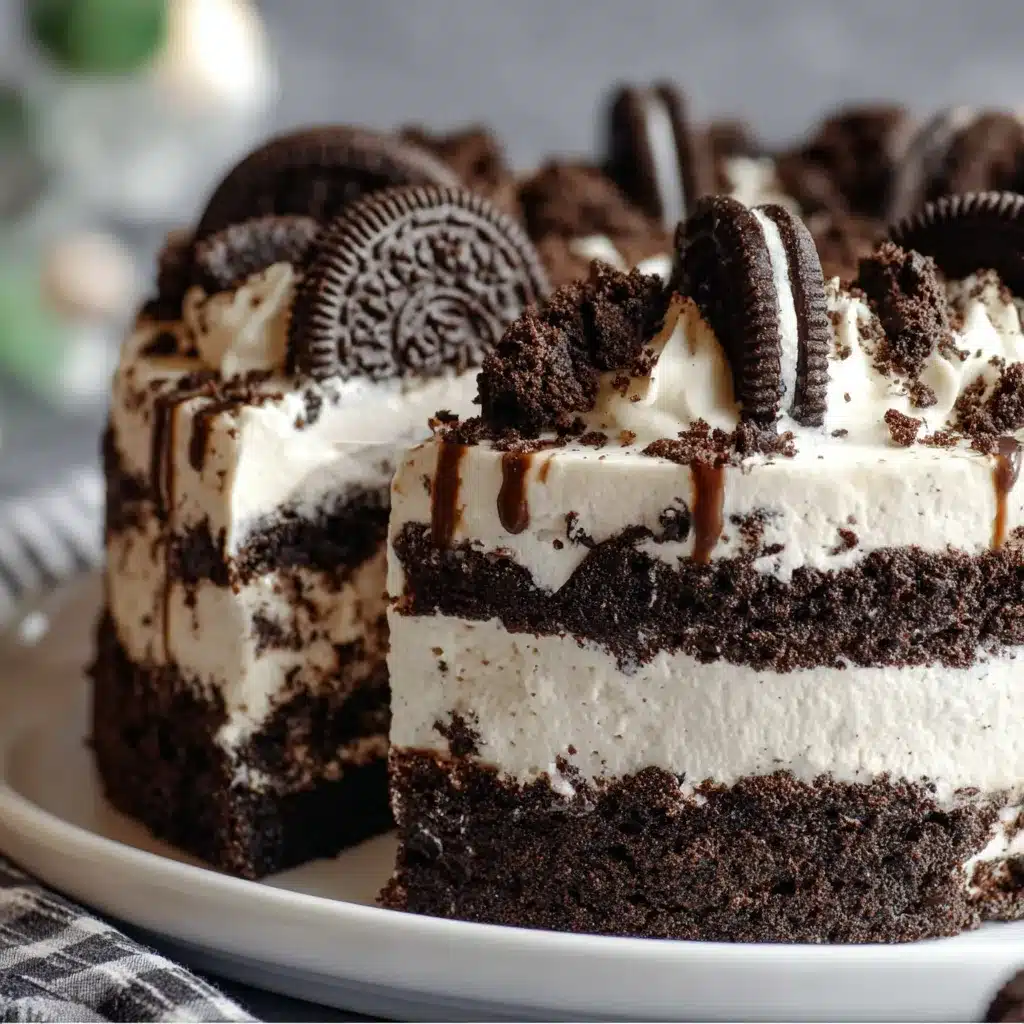
Decorate the top with mini Oreos or a sprinkle of extra crushed Oreos for a touch of whimsy. The black-and-white contrast makes this dessert visually stunning with minimal effort.
Use a sharp knife dipped in hot water (and wiped clean between cuts) to slice the cake neatly. Serve chilled, and watch it disappear faster than you can say “no-bake.”
Tip: If you’re hosting, garnish just before serving to keep the mini Oreos crisp and picture-perfect.
What to Serve with This Recipe
Every creamy, chocolatey bite of this No-Bake Oreo Cake pairs wonderfully with both rich and refreshing accompaniments.
-
A cold glass of milk: The ultimate cookies-and-cream duo — comforting and nostalgic.
-
Hot coffee or espresso: Balances the sweetness and brings out the cocoa flavor in the Oreos.
-
Mint tea: Light and cleansing — perfect after a rich dessert.
-
Vanilla ice cream: For the dessert lover who says, “why stop at one sweet?”
-
Fresh berries: Strawberries or raspberries add a bright, tart contrast.
This no-bake treat shines as a make-ahead dessert for birthdays, family dinners, or summer gatherings when you’d rather keep the oven off. Serve it straight from the fridge, and it’ll be the star of your dessert table.
Variations and Substitutions
Nut-Free Option
If you’re serving guests with nut allergies, you’re in luck — this recipe is already nut-free! Just double-check that your Oreo brand is made in a nut-free facility. Skip any nutty toppings or add-ins, and opt for simple decorations like extra cookie crumbs or mini chocolate chips. You’ll still get that same cookies-and-cream magic, completely safe for everyone to enjoy.
Extra Chocolatey
Calling all chocolate lovers! To make your No-Bake Oreo Cake even more indulgent, melt a few ounces of dark or milk chocolate and whisk it into the cream-cheese mixture before folding in the whipped cream. You can also drizzle a thin layer of chocolate ganache over the chilled cake for a glossy finish.
For a deeper cocoa punch, sprinkle in 1 tablespoon of unsweetened cocoa powder while whipping the cream, or use Double Stuf Oreos for an even richer flavor. A few chocolate shavings or a fudge drizzle on top seals the deal.
Gluten-Free Option
Want to make it gluten-free? It’s easier than you think! Replace the classic Oreos with gluten-free sandwich cookies — many brands now offer versions that taste remarkably close to the original.
Since gluten-free cookies can be slightly drier, add an extra tablespoon of melted butter to your crust to help it hold together. The rest of the recipe stays the same — just ensure your cream cheese, condensed milk, and whipped cream are certified gluten-free.
The result? A dessert so delicious and creamy, no one will ever guess it’s gluten-free.
Storage Instructions
Room Temperature Storage
Because this No-Bake Oreo Cake is made with dairy ingredients like cream cheese and whipped cream, it’s best enjoyed chilled — not left sitting out. Try to keep it at room temperature for no longer than 30 to 60 minutes, especially if it’s a warm day. After serving, promptly return any leftovers to the refrigerator to preserve the cake’s creamy texture and prevent spoilage. For parties or gatherings, slice and serve directly from the fridge, then pop it back in once everyone’s had a piece. A cool cake is a happy cake — and so much more delicious!
Refrigeration Tips
To store your cake in the fridge, cover the springform pan tightly with plastic wrap or foil. You can also transfer slices into an airtight container for easier access. Keep it chilled at 40 °F (4 °C) or below — the ideal temperature for maintaining freshness and preventing separation.
Your No-Bake Oreo Cake will stay fresh for 3 to 4 days in the refrigerator. For the best flavor and texture, slice just before serving rather than cutting the whole cake ahead of time. This keeps the filling firm and prevents moisture from softening the crust.
If you’ve decorated with mini Oreos or extra cookie crumbs, add them right before serving to keep that delightful crunch. If you notice the whipped layer separating slightly after a day or two, simply smooth it out gently with a spatula — it’ll look good as new.
To prevent fridge odors from seeping in (no one wants “cheesecake à la onion”), store the cake away from strong-smelling foods or pop an open box of baking soda nearby.
Freezing Instructions
Yes, you can freeze this dreamy dessert! Once the cake is fully chilled and set, wrap it securely in plastic wrap, then again in aluminum foil. Label it with the date — it will keep beautifully for up to 1 month.
When you’re ready to enjoy it again, transfer the cake to the refrigerator and thaw overnight. The texture may soften slightly after freezing, but you can restore firmness by letting it chill an extra hour before slicing.
For smaller servings, freeze individual slices wrapped tightly in plastic wrap. This way, you can enjoy a single portion anytime without thawing the whole cake. Just remember that freezing may soften the crust a bit and make the whipped layer slightly less airy — but the flavor will still be out-of-this-world delicious.
Recipe Tips and Tricks
Even simple recipes have secrets that take them from good to amazing. Here are a few tried-and-true tips from one home baker to another:
-
Use high-quality cream cheese (full-fat and softened). Lower-fat versions tend to make the filling looser and less stable.
-
Chill your mixing bowl and beaters before whipping the cream — cold tools give you stiffer peaks faster.
-
Don’t over-mix the whipped cream. Stop as soon as you see firm peaks; over-beating can make it grainy.
-
Room-temperature cream cheese mixes more smoothly and ensures a lump-free filling.
-
Press the crust evenly into the pan, reaching every edge. This gives you a solid, uniform base.
-
Use a sharp, hot knife for slicing: dip it in hot water, wipe clean, and repeat for picture-perfect cuts.
-
Add an extra tablespoon of melted butter next time if your crust feels a bit crumbly.
-
Chill overnight if possible — many no-bake Oreo cakes (like the one from Sugar & Sparrow) set best after 8–12 hours.
-
Add mini Oreos just before serving to keep their crisp texture and adorable look intact.
Related Recipes
If you loved this No-Bake Oreo Cake, try these other no-bake or creamy desserts on Creative Cookery:
-
White Chocolate Strawberry Cheesecake– Light, fruity, and just as effortless.
-
Salted Caramel Biscoff Cheesecake– A caramel twist on the no-bake favorite.
FAQs
Can I use salted butter instead of unsalted for the crust?
Yes! You can use salted butter — just be aware that it adds a slightly more savory note. Unsalted butter offers better flavor control, but salted won’t harm the recipe.
Do I need to whip the cream myself or can I use whipped topping instead?
You can absolutely use a ready-made whipped topping like Cool Whip for convenience, but freshly whipped cream gives a richer flavor and a firmer texture that helps the cake set beautifully (as The Busy Baker notes).
How long should I chill the cake before serving?
At least 4 hours is essential, but for the best texture, chill overnight. According to Sugar & Sparrow, longer chill times let the layers set fully and deepen that cookies-and-cream flavor.
Can I make this ahead of time?
Definitely! This cake is made for make-ahead convenience. Assemble it the day before, chill overnight, and it’ll be perfect the next day. Just keep it covered in the fridge until you’re ready to serve.
Why is my crust still crumbly after chilling?
That usually means either not enough butter or cookies weren’t crushed finely enough. Try adding a bit more melted butter next time and press the crust firmly into the pan before chilling.
Can I use a different cookie instead of Oreos?
Absolutely! Swap in chocolate biscuits, gluten-free cookies, or other sandwich cookies for a fun twist. The technique stays the same — it’s the cookies-and-cream spirit that matters most (as Sugar & Sparrow suggests).
Conclusion
This No-Bake Oreo Cake is proof that dessert doesn’t have to be complicated to be spectacular. With just a handful of ingredients, no oven time, and plenty of creamy indulgence, it’s the perfect treat for birthdays, celebrations, or cozy nights in.
Every bite delivers that nostalgic cookies-and-cream flavor — comforting, familiar, and wonderfully satisfying. Whether you’re a seasoned home baker or a total beginner, you’ll find this recipe delightfully foolproof.
Give it a try, and I’d love to hear how it turns out! Leave a comment below or pin this recipe for later. And if you’re sharing it with friends or family — go ahead and make two. This cake tends to disappear fast! 🍰✨
Print
No-Bake Oreo Cake
- Total Time: 4 hours 20 minutes (including chill time)
- Yield: 8 slices
- Diet: Vegetarian
Description
This No-Bake Oreo Cake is a creamy, cookies-and-cream delight that requires no oven. With a crunchy Oreo crust, a smooth cream-cheese and whipped-cream filling, and a fun mini-Oreo garnish, it's easy to make yet feels indulgent. Perfect for snacks, parties or whenever you want a fuss-free treat.
Ingredients
- 36 Oreo cookies (crushed) – forms the crust and adds cookies-and-cream crunch.
- 2 cups heavy whipping cream – provides the light whipped cream component for the filling, helps it set.
- ½ cup powdered sugar – sweetens and stabilises the whipped cream.
- ¼ cup unsalted butter (melted) – binds the crushed Oreos for the crust.
- 1 tsp vanilla extract – adds flavour depth and vanilla warmth.
- 8 oz cream cheese (softened) – gives creamy tang and structure to the filling.
- ½ cup sweetened condensed milk – adds richness, sweetness and smooth texture.
- 1 cup crushed Oreos (for filling) – adds cookie bits inside the filling for texture and flavour.
- ½ cup mini Oreos (for garnish) – decorative touch and extra crunch on top.
Instructions
- Prepare the crust: In a bowl, mix the crushed Oreos with melted butter until evenly moistened. Press the mixture into a springform pan to form the crust. Chill in the fridge for 15 minutes to set firmly.
- Make the whipped-cream base: In a large chilled bowl, beat heavy whipping cream, powdered sugar and vanilla extract until stiff peaks form. Set aside.
- Create the cream-cheese filling: In another bowl, beat the softened cream cheese until smooth. Add the sweetened condensed milk and mix until creamy and well combined.
- Fold the whipped cream into the cream-cheese mixture: Gently fold in the whipped cream until the mixture is uniform without deflating the whipped cream too much. Stir in the 1 cup of crushed Oreos for filling until well distributed.
- Assemble the cake: Pour the filling mixture over the chilled Oreo crust, smoothing out the top with a spatula or offset knife for an even surface.
- Chill: Refrigerate the assembled cake for at least 4 hours (or overnight for best results) so the filling sets firmly, the crust firms up, and the flavours meld.
- Garnish & Serve: Before serving, top with the mini Oreos or extra crushed Oreos. Use a sharp, hot knife (dip in hot water and wipe clean between cuts) to slice into 8 even slices. Serve chilled.
Notes
- Line the bottom of your springform pan with parchment paper for easy removal later.
- Make sure your cream cheese is fully softened (room temperature) so you get a smooth filling without lumps.
- Use a chilled bowl and cold heavy cream to help the whipped cream reach stiff peaks more easily.
- Press the crust mixture firmly and evenly to ensure a stable base and neat slicing later.
- If the crust seems loose, next time add an extra tablespoon of melted butter.
- For best texture and flavour, chill overnight rather than only the minimum 4 hours.
- Add the mini Oreo garnish just before serving so they retain their crispness.
- Prep Time: 20 minutes
- Cook Time: 0 minutes
- Category: Dessert
- Method: No-Bake
- Cuisine: American
Nutrition
- Serving Size: 1 slice
- Calories: 380 kcal
- Sugar: approximate – about 23 g
- Sodium: approximate – about 180 mg
- Fat: approximate – about 26 g
- Saturated Fat: approximate – about 15 g
- Unsaturated Fat: approximate – about 9 g
- Trans Fat: approximate – 0.5 g
- Carbohydrates: approximate – about 28 g
- Fiber: approximate – about 1 g
- Protein: approximate – about 4 g
- Cholesterol: approximate – about 55 mg