Introduction to Old Fashioned Cherry Delight
A nostalgic no-bake dessert that brings joy to any table
There's something undeniably charming about the term Old Fashioned Cherry Delight. This no-bake dessert is more than just a tasty treat; it’s a delightful trip down memory lane. Picture the family gatherings of your childhood, the laughter ringing out, the warmth of togetherness, and, of course, the arrival of that delightful cherry dessert sitting proudly at the table. Instantly, smiles appear, and everyone scrambles for a slice.
The beauty of this dessert lies not only in its rich, velvety layers of cream cheese, whipped topping, and vibrant cherries but also in its simplicity. It requires no oven, making it perfect for those hot summer days when turning on the stove feels anything but appealing. One of my favorite things about this recipe is how adaptable it is. You can easily switch out the fruit or toss in some crushed nuts for a delightful crunch.
Perfect for busy families and weekend gatherings
Let me tell you, if you’re part of a busy household or often find yourself hosting weekend gatherings, the Old Fashioned Cherry Delight is practically a lifesaver. Imagine being able to whip up a stunning dessert in less than an hour, and then just letting it chill in the fridge while you focus on other things—like catching up with friends or enjoying a peaceful moment with family. It's truly that easy!
Whether you’re welcoming guests for a BBQ or simply treating your family midweek, this dessert checks all the boxes. It’s quick, full of flavor, and sure to impress everyone around the table. And trust me, when you hear those little “Mmm's” after the first bite, you'll know you’ve done something right.
Gathering around a dish like this doesn’t just fill bellies; it creates memories. Whether it's the sweet bite of cherry or the creamy, dreamy texture, each mouthful invites everyone to slow down and enjoy the sweetness of life, together. So, grab your mixing bowl, and let’s get started on this family favorite that promises to bring joy to any table!
Why You’ll Fall in Love with Old Fashioned Cherry Delight
Creamy layers that melt in your mouth
If you’re anything like me, the first bite of Old Fashioned Cherry Delight feels like a gentle hug from your grandma. The creamy layers—made with soft cream cheese and whipped topping—blend together seamlessly, creating a luscious texture that literally melts in your mouth. With each scoop, you’re treated to a rich yet light dessert that balances sweetness with a hint of tanginess from the cherries. Trust me, the flavor is one you’ll want to revisit again and again.
The delightful crunch of the crust paired with fruity sweetness
Let’s not forget about that perfectly flaky crust! It adds a delightful crunch that satisfies the craving for texture while beautifully complementing the fruity sweetness of the cherries. The mixture of graham cracker crumbs and butter forms a base that’s firm enough to hold everything together, yet crumbly enough to feel decadent. Have you ever noticed how the crunch suddenly gives way to gooey creaminess? It’s like a mini celebration in your mouth with each delightful bite. If you want to take it up a notch, consider adding some crushed nuts for an extra crunchy element.
Easy prep and minimal cleanup make it a weeknight favorite
Now, if you’re a busy bee working through the week, you’ll appreciate that prepping this Old Fashioned Cherry Delight is as easy as pie—without any of the fuss! You can whip it together in under an hour, and honestly, it requires minimal equipment. Just a mixing bowl, a spatula, and a baking dish. Plus, because it’s a no-bake dessert, cleanup is a breeze. Who wouldn’t want a delicious homemade treat that looks impressive but doesn’t tie you down in the kitchen? After all, life is too short for complicated desserts!
So, are you ready to fall in love? Get your ingredients, and let’s make some cherry magic happen!
Ingredients You’ll Need for Old Fashioned Cherry Delight
When it comes to Old Fashioned Cherry Delight, each layer blends harmoniously to create a dessert that feels like a warm hug. Let’s break down the ingredients you’ll want to gather, starting with the foundation, the crust, and then building up to that delightful cherry topping that brings it all together.
Crust ingredients for a buttery base
For the crust, you’ll need:
- 1 cup of all-purpose flour: This is your primary ingredient that gives structure.
- ½ cup of butter, softened: Nothing beats the richness of real butter in creating that flaky, tender crust.
- ¼ cup of powdered sugar: This adds just the right amount of sweetness without being too overpowering.
Mix these ingredients until you form a dough that holds together but isn’t sticky. If it feels too dry, add a teaspoon of cold water. Trust me; a buttery base is where the magic starts.
Filling components for the creamy layer
Now, let’s move on to the creamy filling that elevates this dessert:
- 8 oz cream cheese, softened: This adds a lovely richness and creaminess.
- ½ cup granulated sugar: A touch of sweetness is essential.
- 1 cup of whipped topping: For that lightness that makes each bite melt in your mouth.
- 1 teaspoon vanilla extract: A hint of vanilla enhances all the other flavors beautifully.
Beat the cream cheese and sugar together until smooth, then fold in your whipped topping. This filling is what dreams are made of—a celebration of creamy goodness!
Cherry topping for that final touch
To crown your masterpiece, you can’t forget the cherries:
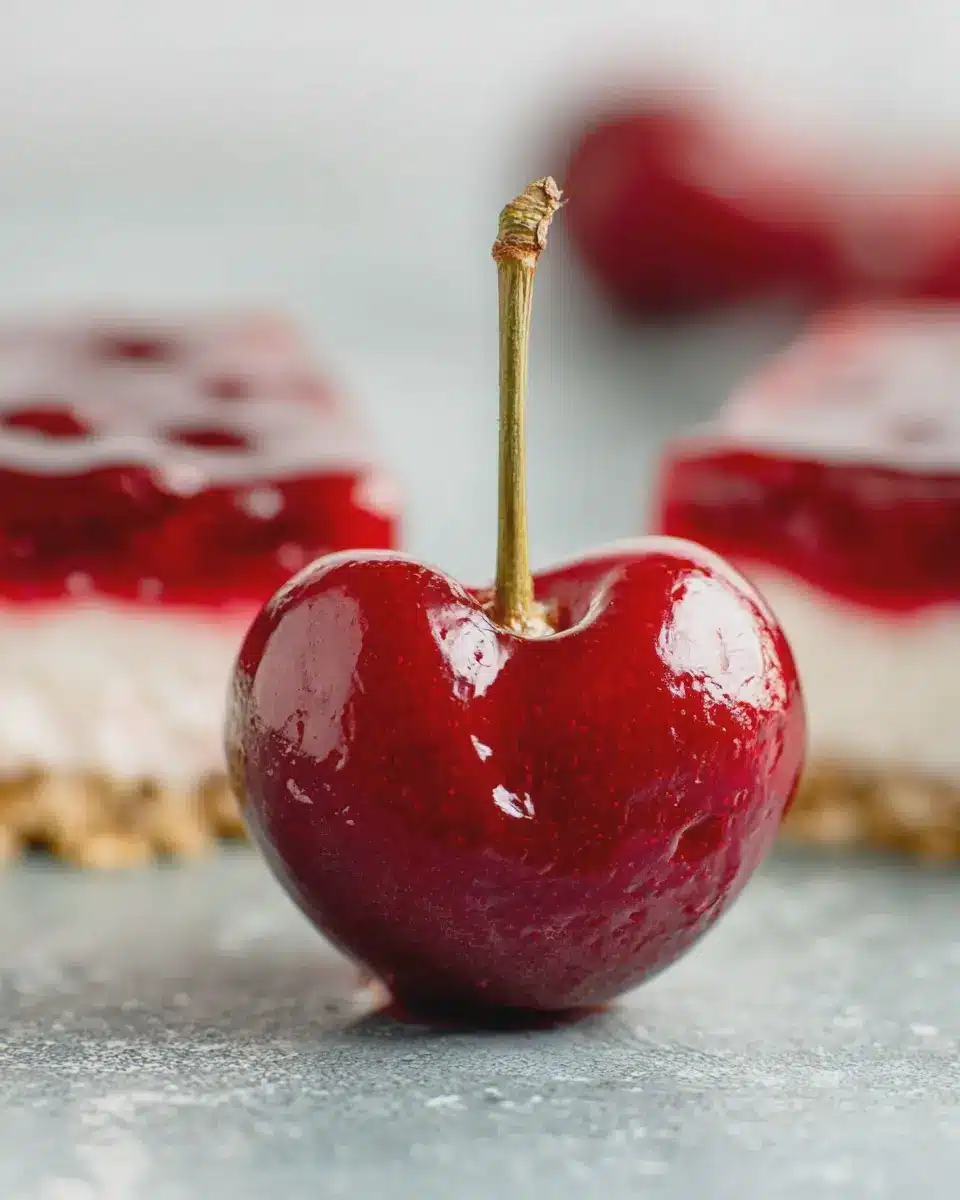
- 1 can (about 20 oz) cherry pie filling: Use this for its sweet and tart profile that makes it oh-so delightful.
- Fresh cherries (optional): If you want to take it up a notch, toss in some fresh pitted cherries for a lovely tartness and color boost.
As you layer in the cherry topping, picture yourself sipping coffee and savoring each bite. Looking for substitutions? Diced strawberries or blueberries can also work wonderfully as a twist.
Remember, the joy of making Old Fashioned Cherry Delight lies in the creation as much as the end result. Gather your ingredients, and let’s get to baking!
Essential Kitchen Tools for Making Cherry Delight
Creating a delightful Old Fashioned Cherry Delight is not only about the ingredients you choose but also the kitchen tools that make your cooking experience smoother. Let’s dive into the essentials that will help you whip up this sweet treat effortlessly!
Mixing Bowls and Electric Mixer
First and foremost, you’ll need a set of good mixing bowls — I always go for ones that are sturdy and have a non-slip base. This makes it so much easier to mix without having to hold the bowl down. An electric mixer is equally important. It saves you time and muscle power, especially when you’re whipping cream or mixing up your base. Trust me, there’s nothing better than a fluffy whip to elevate your dessert!
8×8-Inch Square Pan
Next up is the 8×8-inch square pan. This pan is perfect for both baking and layering your Cherry Delight. Its size is ideal, ensuring that your dessert sets perfectly without overflowing. Plus, it’s easy to cut into neat squares for serving, which is always a bonus when sharing with friends and family.
Rubber Spatula for Easy Spreading
Lastly, don’t forget a good rubber spatula! This tool is a game-changer for spreading your layers evenly without scratching your pan. I love how flexible and forgiving they are— it’s almost like having a little kitchen helper right there with you! A rubber spatula not only helps in spreading the cherry filling smoothly but is also fantastic for folding in whipped cream or other delicate mixtures.
Gather these tools, and you’re well on your way to mastering the comforting tradition of making Old Fashioned Cherry Delight. Each tool plays its part in creating something delicious, so they’re worth investing in. Happy baking!
Step-by-Step Guide to Making Old Fashioned Cherry Delight
Step 1: Prepare the crust
The crust is where your journey to making Old Fashioned Cherry Delight begins, and let me tell you, it sets the stage for the entire dessert. Start by preheating your oven to 350°F (175°C). Grab a mixing bowl and combine 1 ½ cups of crushed graham crackers, ½ cup of sugar, and ½ cup of melted butter. The combination of butter and sugar with those crunchy crumbs creates a mouthwatering foundation that you won’t be able to resist.
Next, press this crumbly mixture evenly into the bottom of a 9x13 inch baking dish. Use the back of a measuring cup to pack it down nice and firm. Don't worry if it's a bit messy; that's part of the character! Pop this into the preheated oven for about 10 minutes until it's golden and set. The aroma wafting through your kitchen will have everyone asking, "What’s baking?!" Once it's out, let it cool completely. This is crucial—it ensures your filling doesn’t start to melt into the crust, leaving you with a gooey mess.
Step 2: Create the creamy filling
While the crust cools, let’s whip up that dreamy creamy filling. In a large bowl, beat together 8 ounces of cream cheese (make sure it's softened) and 1 cup of powdered sugar. You want this to be wonderfully smooth; so feel free to take your time and mix it well with an electric mixer. This is also the moment to add in 2 cups of whipped topping (or whipped cream if you prefer). Gently fold it in to maintain that lovely airy texture.
You might wonder if you can swap out the cream cheese for something lighter—absolutely! You can use Greek yogurt as a healthier alternative, just keep in mind it will change the flavor profile slightly. For an extra touch, add a splash of vanilla extract. It elevates the flavor and makes it smell delightful!
Step 3: Layer the cherry pie filling
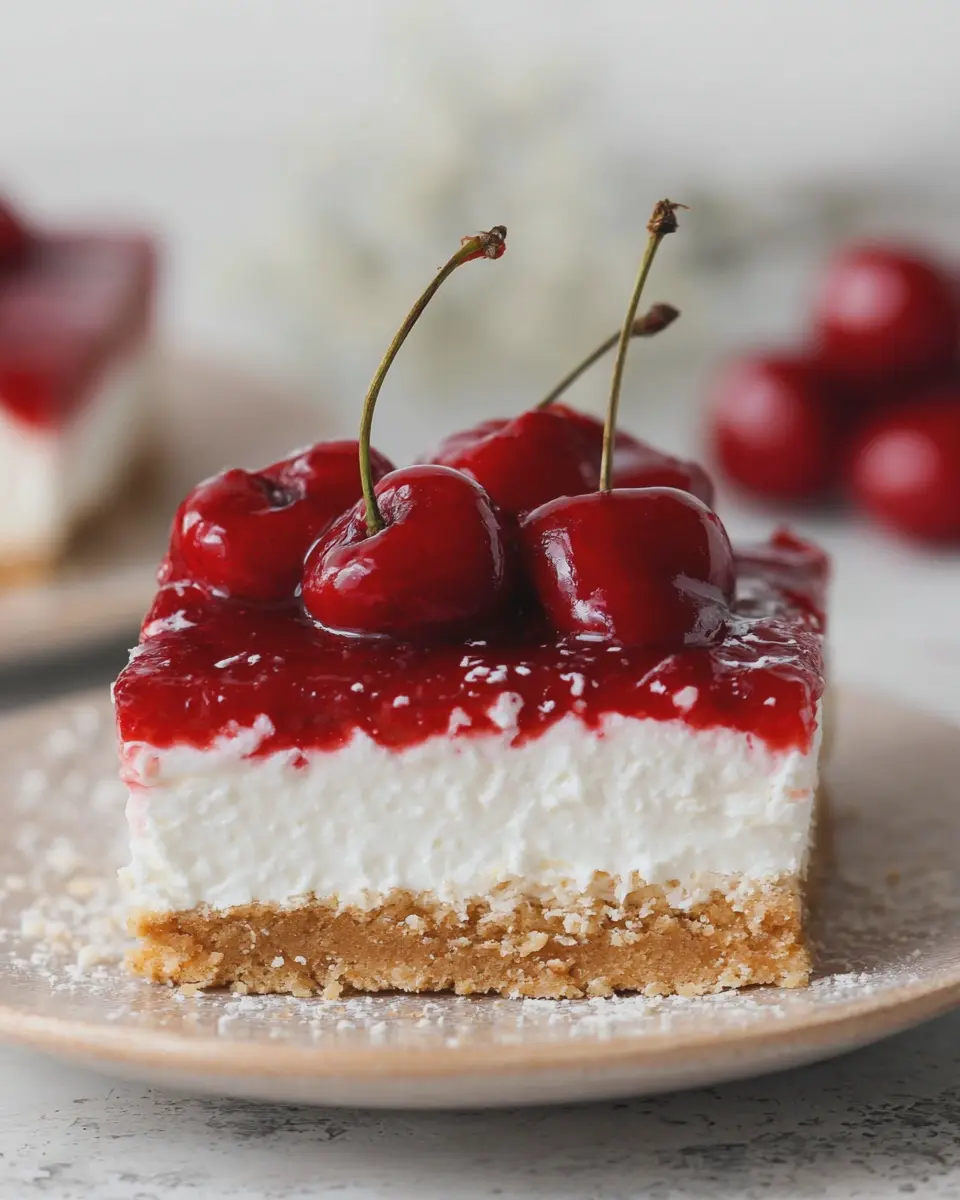
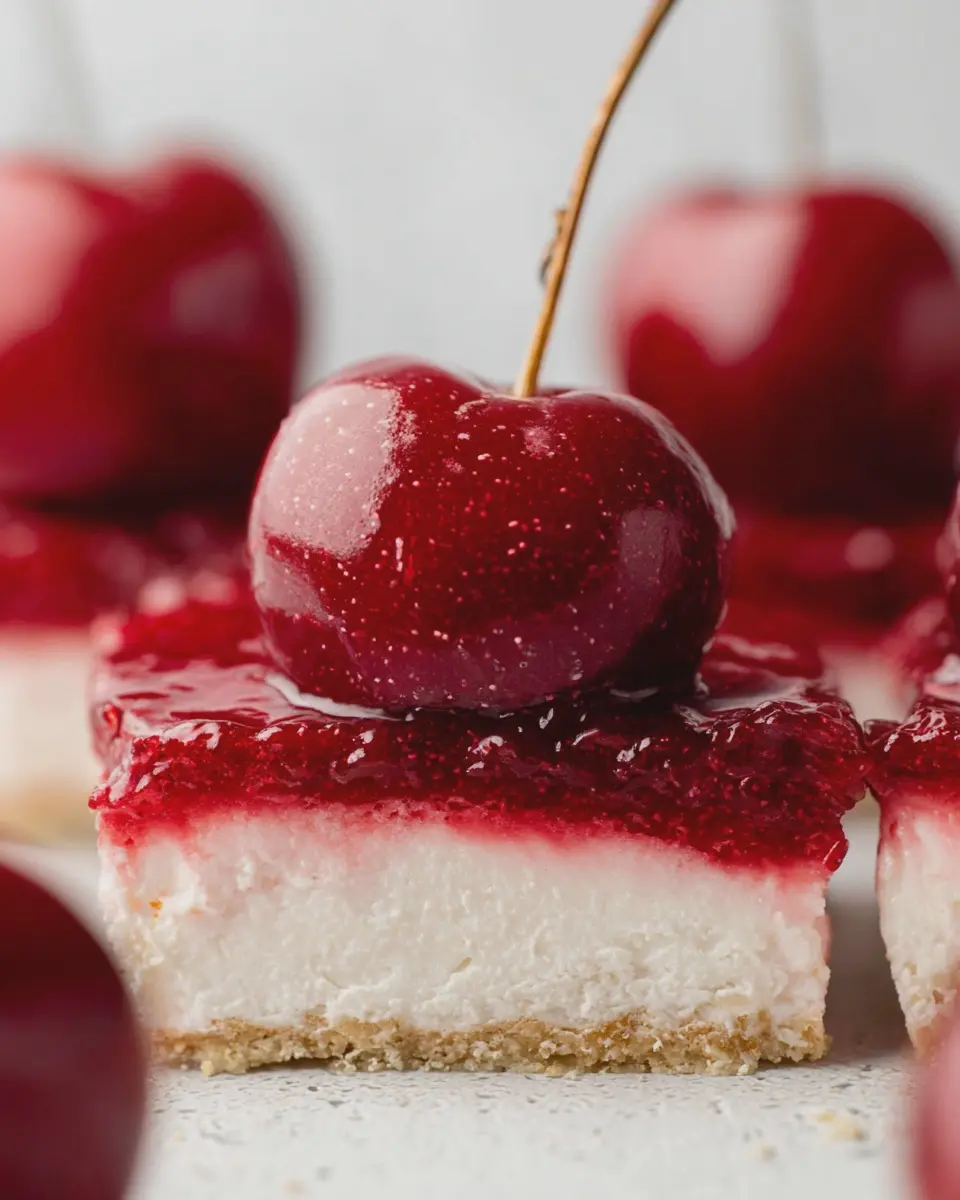
Now, the fun part! With your filling prepped and your crust cooled, it's time to build your Cherry Delight. Start by spreading the creamy filling evenly over the crust. Take your time—this is where the layers of flavor come together! After you’ve spread it out, it's time to crown your delicious creation with 1 can (about 21 ounces) of cherry pie filling. Spoon it generously over the cream layer, letting those beautiful vibrant cherries shine through. If you’re feeling adventurous, you can drizzle a bit of cherry juice over the top for added color and sweetness.
This dessert is as much about looks as it is about taste. The vibrant red of the cherries against the creamy filling is sure to catch anyone's eye!
Step 4: Chill to perfection before serving
Patience is truly a virtue here, so don’t rush ahead. Place your assembled Old Fashioned Cherry Delight in the refrigerator and let it chill for at least 4 hours, or ideally overnight. This time allows the flavors to meld beautifully, resulting in the kind of refreshing taste that pairs perfectly with warm summer evenings or family gatherings.
When you're finally ready to serve, cut it into squares with a sharp knife, and watch as the layers reveal themselves. The first slice often looks the best—grab a plate and be ready for compliments! You can garnish with additional whipped cream or even some chocolate shavings if you want to impress.
And remember, this dessert keeps well in the fridge for a couple of days—if it lasts that long! Just ensure it's covered tightly to keep that crust nice and crisp while the filling stays luscious. Enjoy the nostalgia this Old Fashioned Cherry Delight brings and don’t be surprised when it becomes a staple in your own recipe collection!
Old Fashioned Cherry Delight for a Comforting Family Dessert
- Total Time: 35 minutes
- Yield: 8 servings
- Diet: Vegetarian
Description
A delightful dessert that brings warmth and nostalgia to family gatherings.
Ingredients
- 1 cup cherry pie filling
- 1 cup whipped cream
- 1 cup crushed graham crackers
- ½ cup sugar
- ½ cup butter, melted
Instructions
- Preheat oven to 350°F (175°C).
- In a bowl, mix crushed graham crackers with melted butter and sugar.
- Press the mixture into the bottom of a baking dish.
- Spread cherry pie filling evenly over the crust.
- Top with whipped cream.
- Bake for 20 minutes.
- Let cool before serving.
Notes
- For best flavor, chill the dessert for a few hours before serving.
- Top with additional whipped cream and cherries if desired.
- Prep Time: 15 minutes
- Cook Time: 20 minutes
- Category: Dessert
- Method: Baking
- Cuisine: American
Nutrition
- Serving Size: 1 slice
- Calories: 250
- Sugar: 15g
- Sodium: 150mg
- Fat: 10g
- Saturated Fat: 6g
- Unsaturated Fat: 3g
- Trans Fat: 0g
- Carbohydrates: 38g
- Fiber: 1g
- Protein: 2g
- Cholesterol: 30mg