
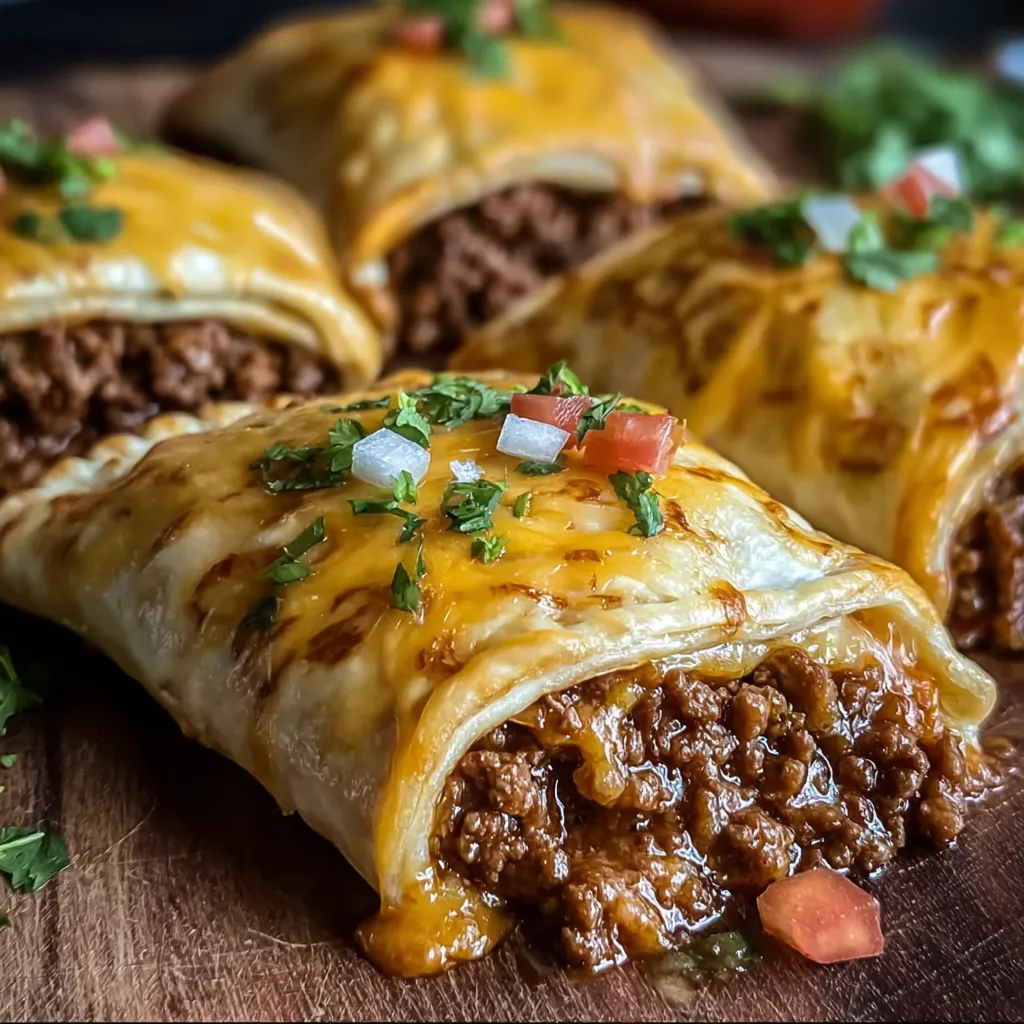
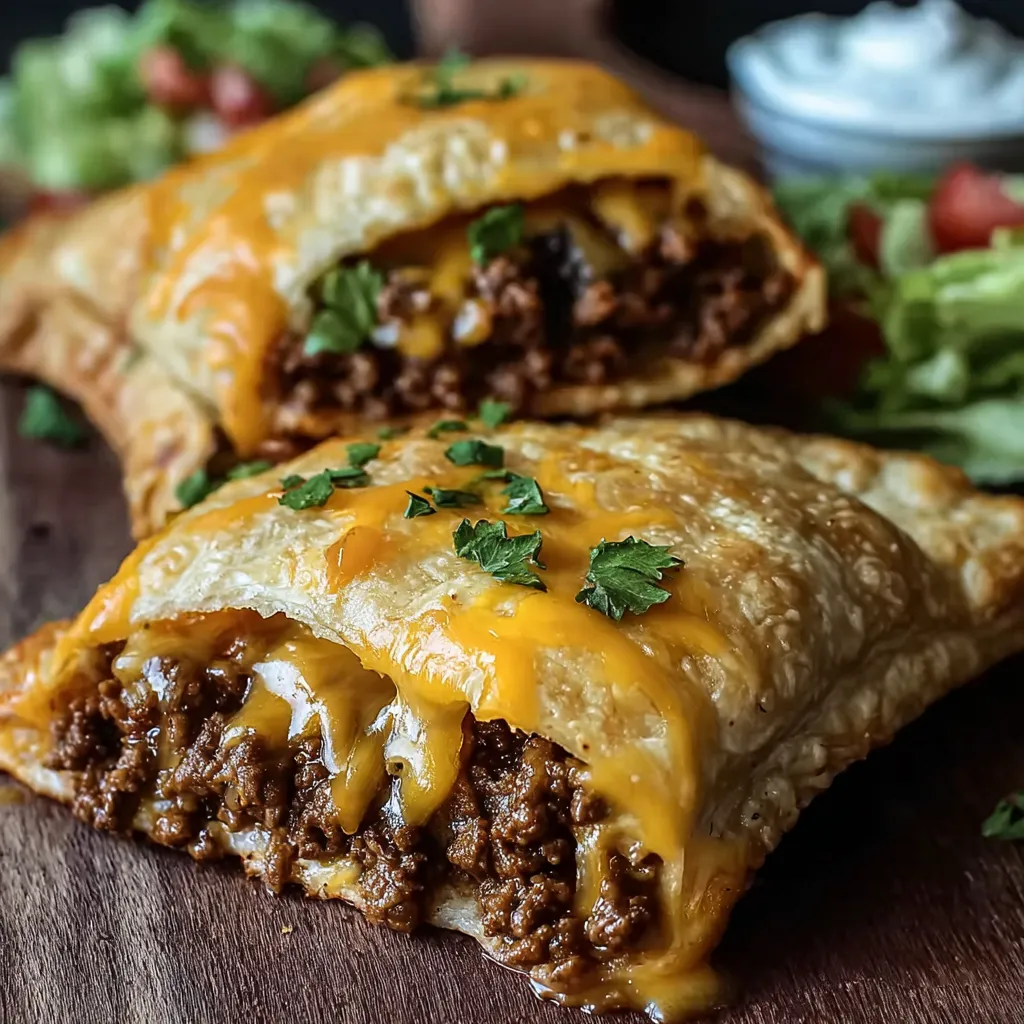
There’s something incredibly satisfying about biting into a warm, cheesy, flavor-packed snack that oozes comfort and joy. These Loaded Taco-Stuffed Cheesy Pockets are exactly that — a melty, savory, Tex-Mex treat wrapped in a soft tortilla and baked until perfectly golden. Whether you're feeding a hungry family, prepping for game night, or just craving something indulgent but easy, this recipe checks every box.
I first made this recipe on a chilly Friday night, craving something cheesy and satisfying. The smell alone had the family hovering in the kitchen, asking, “Are they ready yet?” Since then, it’s become one of our go-to dinners — simple, crowd-pleasing, and customizable.
From the rich, creamy center to the crispy, buttery finish, these taco pockets deliver everything you love about tacos — with a fun, cozy twist. Let’s dive into why you’re going to love them just as much.
Why You’ll Love This Recipe
If you’re a fan of easy comfort food with bold flavor and minimal cleanup, this recipe is about to earn a top spot in your rotation. Here's what makes these taco-stuffed cheesy pockets such a hit:
Rich, Creamy Cheesy Center
This isn’t your average taco filling. The combination of softened cream cheese and sharp shredded cheddar creates a luxuriously gooey interior that melts beautifully during baking. Every bite delivers creamy, cheesy goodness that complements the savory beef perfectly.
Pantry-Friendly Ingredients
You won’t need a long grocery list or specialty items. Most of the ingredients — ground beef, salsa, taco seasoning, tortillas — are probably already in your pantry or fridge. And even if they’re not, they’re affordable and easy to find at any supermarket.
Foolproof Preparation
No complicated steps, fancy gadgets, or culinary skills required. The prep is straightforward: cook the beef, mix the cheese and salsa, assemble, and bake. It’s beginner-friendly, kid-approved, and totally weeknight-worthy.
Customizable to Your Taste
One of the best things about this recipe is how versatile it is. Prefer things spicy? Add some chopped jalapeños. Going meatless? Swap the beef for black beans or mushrooms. You can even sneak in some veggies for the little ones or tailor the spices to your preference.
Ingredients
This recipe keeps things simple without sacrificing flavor. Here’s what you’ll need to make these Loaded Taco-Stuffed Cheesy Pockets — plus a quick look at why each ingredient matters.
Full List of Ingredients
-
1 packet taco seasoning – Brings the classic, bold Tex-Mex flavor we all know and love.
-
1 lb ground beef – A hearty, savory base that soaks up all the seasoning.
-
½ cup salsa – Adds moisture and a tangy kick to the cheesy mixture.
-
8 oz cream cheese, softened – Creates a rich, creamy foundation that holds everything together.
-
2 tablespoon melted butter – Brushed on top to give each pocket a golden, crisp finish.
-
1 cup shredded cheddar cheese – Melts into gooey deliciousness and adds that perfect cheesy pull.
-
12 (6-inch) tortillas – The soft, foldable canvas that wraps up all the goodness inside.
How to Make Loaded Taco-Stuffed Cheesy Pockets
Making these Loaded Taco-Stuffed Cheesy Pockets is easier than you might think — and honestly, kind of fun! Once you get the rhythm of assembling them down, you'll breeze through the whole batch. This recipe is designed to be low-stress and high-reward, perfect for both weeknight meals and casual get-togethers.
Step-by-Step Instructions
Here’s how to turn a handful of simple ingredients into golden, gooey taco pockets of joy:
-
Preheat your oven to 350°F (175°C). Lightly grease a baking tray or line it with parchment paper for easier cleanup.
-
Cook the ground beef
-
In a medium skillet over medium heat, cook 1 pound of ground beef until fully browned, breaking it up with a spoon or spatula as it cooks.
-
Drain off any excess grease to keep the pockets from getting soggy.
-
-
Add the taco seasoning
-
Stir in 1 packet of taco seasoning according to the package instructions (usually with a bit of water).
-
Let it simmer for a few minutes until the mixture thickens and the flavors combine.
-
-
Prepare the cheesy filling
-
In a mixing bowl, combine 8 oz softened cream cheese and ½ cup salsa.
-
Mix until smooth and creamy — this will be your luscious base layer.
-
-
Assemble the pockets
-
Lay out one 6-inch tortilla on a clean surface.
-
Spread 1–2 tablespoons of the cheese mixture in the center.
-
Add a spoonful of the seasoned beef, then sprinkle with shredded cheddar cheese (about 1–2 tablespoons).
-
Fold the tortilla like a burrito — sides in first, then roll it up tightly.
-
Place seam-side down on the prepared tray. Repeat with remaining tortillas and filling.
-
-
Brush with butter
-
Lightly brush the tops with 2 tablespoons of melted butter. This step helps create that golden, crispy finish in the oven.
-
-
Bake for 15 minutes
-
Bake until the tortillas are golden brown, slightly puffed, and the cheese inside is bubbly.
-
-
Cool slightly and serve
-
Let them sit for 5 minutes (if you can wait!), then serve warm with your favorite toppings.
-
What to Serve with This Recipe

These cheesy taco pockets are satisfying on their own, but pairing them with the right sides and drinks takes the whole experience up a notch.
Suggested Pairings
Drinks
-
Iced tea with lime
-
Sparkling lime soda
-
Classic margaritas (for the adults!)
Sides
-
Mexican rice
-
Refried or black beans
-
Grilled corn on the cob
Toppings
-
Guacamole
-
Sour cream
-
Fresh salsa or pico de gallo
-
Shredded lettuce and sliced olives for crunch
Variations and Substitutions
One of the best things about this recipe is how flexible it is. Here are a few easy swaps to make it your own:
Spicy Version
If you love heat, try:
-
Using hot salsa or adding diced jalapeños to the filling
-
Sprinkling in chili flakes or a dash of cayenne pepper
-
Serving with a drizzle of hot sauce on top
Vegetarian Option
Skip the beef and go meatless:
-
Use seasoned black beans, chopped mushrooms, or textured vegetable protein (TVP)
-
Add sautéed bell peppers or corn for extra texture
Gluten-Free Option
To make these gluten-free:
-
Use certified gluten-free tortillas (corn tortillas work, but may need softening to fold)
-
Double-check your taco seasoning to make sure it doesn’t contain any hidden gluten
Kid-Friendly Version
Make them milder for little taste buds:
-
Use mild taco seasoning
-
Add sweet corn, extra cheese, or even a few black olives
-
Cut into halves or quarters for small hands to hold
Storage Instructions
These pockets are excellent for meal prep, and leftovers taste just as good the next day!
Room Temperature
-
Once baked, don’t leave them out for more than 2 hours to avoid any food safety issues.
Refrigeration
-
Store in an airtight container in the fridge for up to 3 days.
-
Reheat in the microwave for 45–60 seconds, or in a 350°F oven for 8–10 minutes to restore crispiness.
Freezing
-
These are freezer-friendly! For best results, freeze them unbaked.
-
Wrap each pocket in foil or plastic wrap, then store in a zip-top bag.
-
When ready to eat, bake from frozen at 350°F for 20–25 minutes, or until heated through and golden.
Recipe Tips and Tricks
Before you dive into assembling your cheesy pockets of joy, here are a few tried-and-true tips to make the process smoother and the results even better. These little tweaks go a long way in making the recipe foolproof and extra delicious.
-
Warm your tortillas slightly before folding — 10–15 seconds in the microwave will do the trick. It makes them more pliable and less likely to tear.
-
Soften the cream cheese completely before mixing with salsa. This makes for a smooth, even filling without lumps.
-
Prep the filling ahead of time — both the beef and the cheese mixture can be made a day in advance and stored in the fridge for quick assembly.
-
Don’t overstuff the tortillas. It’s tempting (I know), but too much filling can cause them to split or leak.
-
Want a crispier finish? Use an air fryer instead of the oven for extra crunch — just a few minutes makes a big difference!
Related Recipes
If you loved these Loaded Taco-Stuffed Cheesy Pockets, you might enjoy:
-
Taco Lasagna with Tortillas: Layered Tex-Mex flavors in a comforting casserole.
-
Cheesy Pepperoni Pizza Bombs: A fun, bite-sized pizza twist!
-
Cream Cheese & Bacon Stuffed Chicken: Bold flavors and melty cheese in every bite.
FAQs
We get it — when you’re trying a new recipe, you want to know all the what-ifs. Here are the most common questions (and helpful answers!) about making Loaded Taco-Stuffed Cheesy Pockets.
Can I use chicken instead of beef?
Absolutely! Shredded rotisserie chicken works beautifully and soaks up the taco seasoning just like beef. It's a great way to use up leftovers too.
Can I air fry these instead of baking?
Yes! Pop them in your air fryer at 375°F for about 10 minutes. They come out golden, crispy, and just a little bit addictive.
Can I make them ahead of time?
Definitely. You can assemble the pockets, store them in an airtight container, and refrigerate for up to 24 hours before baking. Great for meal prepping or party planning.
Are they freezer-friendly?
They sure are. For best results, freeze before baking. Wrap each one tightly in foil or plastic wrap, label them, and bake straight from frozen when you're ready. Just add a few extra minutes to the cook time.
What cheese works best?
Cheddar is the classic choice, but Monterey Jack or a Mexican blend also melt beautifully and add different flavor notes. Use whatever you love — or mix them up!
Conclusion
Loaded Taco-Stuffed Cheesy Pockets are more than just a meal — they’re a warm, cheesy hug wrapped in a tortilla. Whether you're whipping them up for a busy weeknight, a cozy movie night, or a fun party appetizer, this recipe delivers comfort, flavor, and a whole lot of smiles.
What I love most is how adaptable they are. You can customize the filling, prep them ahead, freeze for later, and still get delicious results every time. They’re fun to make, even more fun to eat, and guaranteed to become a family favorite.
Print
Loaded Taco-Stuffed Cheesy Pockets
- Total Time: 30 minutes
- Yield: 12 pockets
Description
Loaded Taco-Stuffed Cheesy Pockets are filled with seasoned beef, creamy cheese, and salsa, wrapped in tortillas and baked to golden perfection.
Ingredients
- 1 packet taco seasoning
- 1 lb ground beef
- ½ cup salsa
- 8 oz cream cheese, softened
- 2 Tbsp melted butter
- 1 cup shredded cheddar cheese
- 12 (6-inch) tortillas
Instructions
- Preheat oven to 350°F (175°C). Lightly grease a baking tray.
- Cook ground beef in a skillet until browned. Drain fat.
- Stir in taco seasoning per packet instructions.
- Mix cream cheese and salsa in a bowl until smooth.
- Lay out tortilla, add cheese mixture, beef, and shredded cheddar.
- Fold burrito-style and place seam-side down on tray.
- Brush with melted butter.
- Bake for 15 minutes or until golden and crisp.
- Cool slightly and serve with desired toppings.
Notes
- Use air fryer for extra crunch (375°F for 10 mins).
- Swap beef with shredded chicken or black beans.
- Freeze unbaked pockets for later.
- Prep Time: 15 minutes
- Cook Time: 15 minutes
Nutrition
- Serving Size: 1 pocket
- Calories: 270
- Sugar: 2g
- Sodium: 480mg
- Fat: 17g
- Saturated Fat: 8g
- Unsaturated Fat: 6g
- Trans Fat: 0g
- Carbohydrates: 18g
- Fiber: 1g
- Protein: 13g
- Cholesterol: 45mg