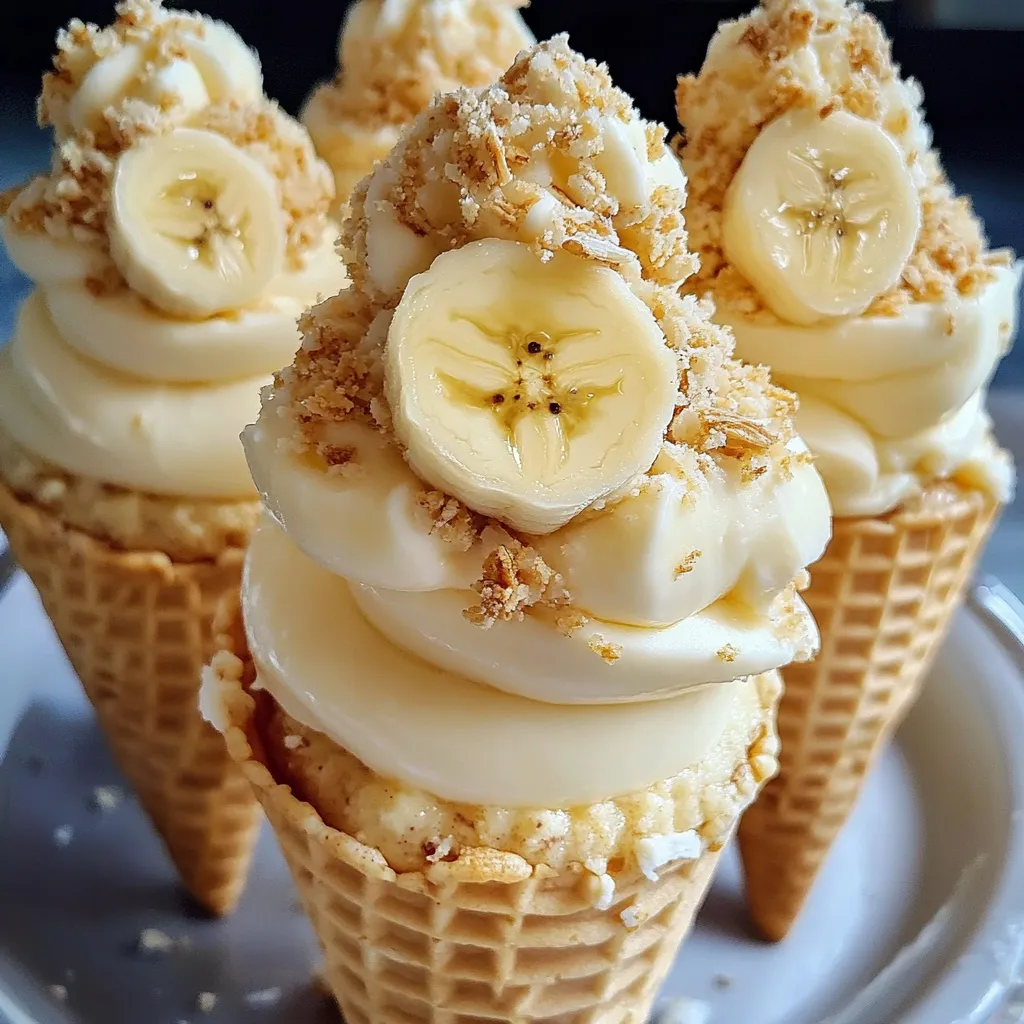
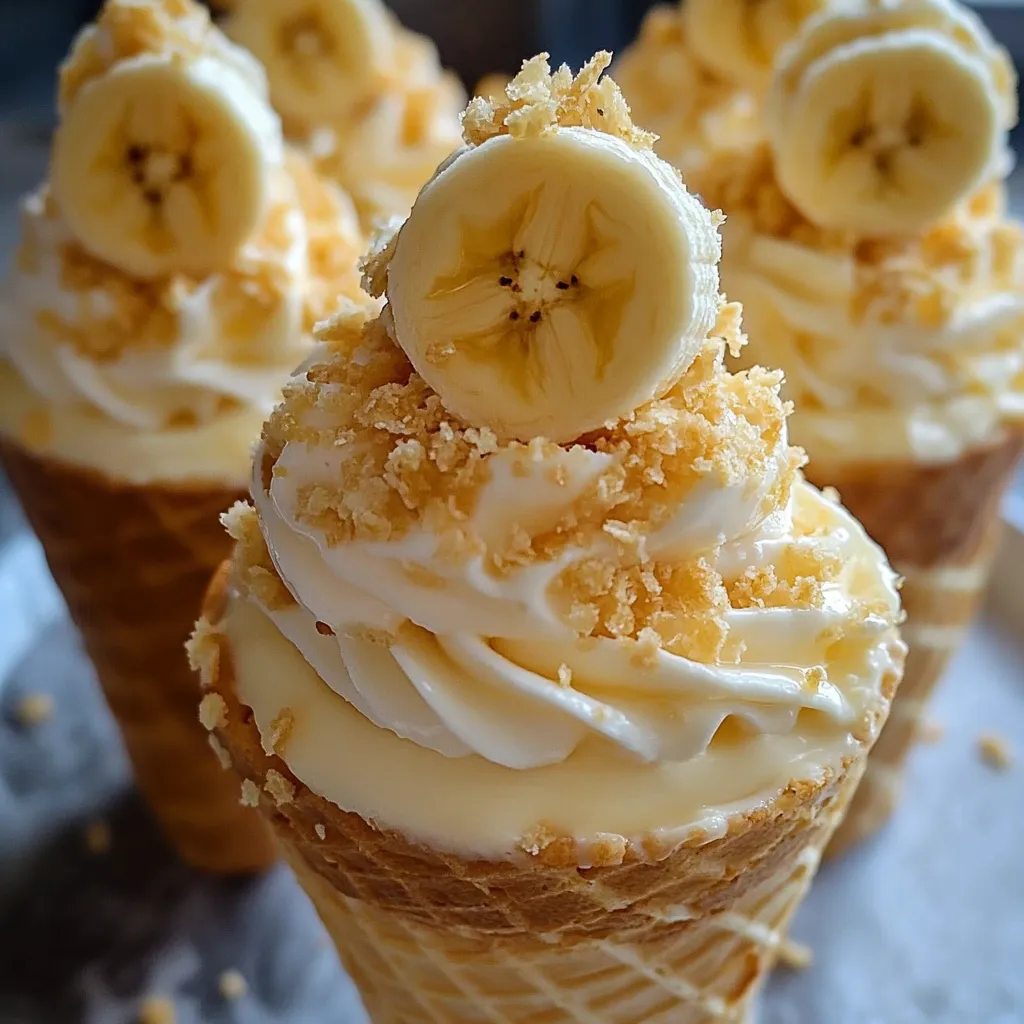
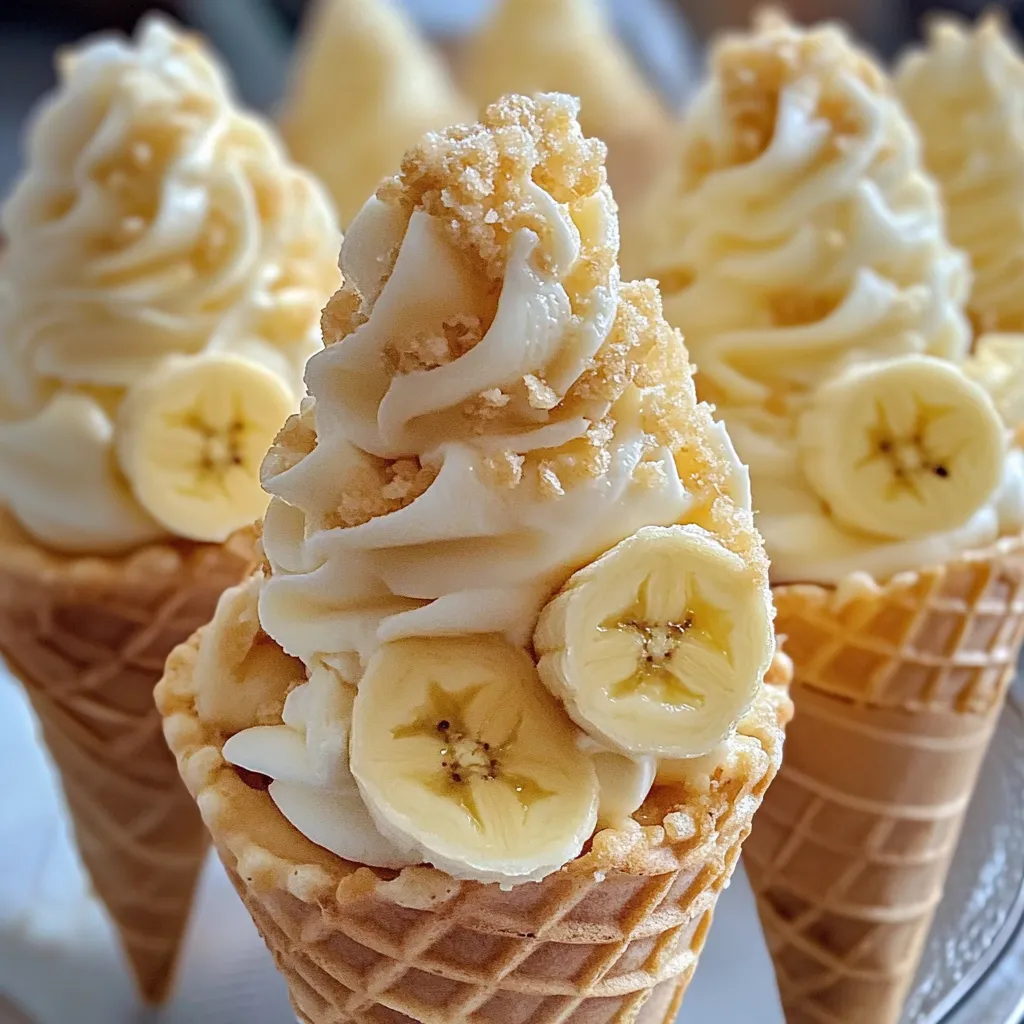
There’s something magical about a dessert that combines the creamy richness of cheesecake with the nostalgic sweetness of banana pudding. Enter Banana Pudding Cheesecake Cones, a playful twist on two beloved classics. Served in crispy waffle cones and topped with sliced bananas, whipped cream, and crushed vanilla wafers, this treat is as visually stunning as it is delicious. Perfect for parties, family gatherings, or any celebration, these cones are easy to prepare and guarantee to impress. Whether you’re craving a fun dessert for kids or a decadent treat for yourself, this recipe is the perfect mix of creamy, crunchy, and fruity flavors.
Ready to dive into the fun? Let’s explore everything you need to create this irresistible dessert!
Ingredients
What You’ll Need
Here’s a simple list of all the ingredients you’ll need to whip up these cones. Gather these items, and you’re already halfway to dessert perfection:
- Cream cheese: 8 ounces, softened, for a rich and creamy cheesecake base.
- Granulated sugar: 1 cup, to add the perfect amount of sweetness.
- Vanilla extract: 1 teaspoon, for a touch of fragrant warmth.
- Sour cream: 1 cup, to bring tanginess and balance to the cheesecake filling.
- Heavy cream: 1 cup, whipped for a fluffy and light texture.
- Banana puree: ½ cup, made from about two ripe bananas, for natural sweetness and flavor.
- Crushed vanilla wafers: ½ cup, for a subtle crunch folded into the cheesecake mixture.
- Waffle cones: 12, to hold your creamy filling and provide a satisfying crunch.
- Bananas: 2, sliced, for a fresh and fruity topping.
- Whipped cream: Optional, for garnish and a touch of elegance.
- Additional crushed vanilla wafers: Optional, for sprinkling over the top for texture.
Substitutions and Additions
One of the best things about this recipe is how customizable it is. Whether you’re accommodating dietary preferences or looking to get creative, here are a few substitutions and optional upgrades:
- Gluten-Free Options: Swap out regular waffle cones and vanilla wafers for gluten-free versions to make this dessert accessible for everyone.
- Flavor Enhancements: Add a drizzle of caramel or melted chocolate over the cones for an extra indulgent touch.
- Seasonal Spices: A sprinkle of cinnamon or nutmeg in the cheesecake filling can add warmth and depth, making it perfect for fall or holiday occasions.
- Fresh Fruits: While bananas are the star of this dessert, feel free to add sliced strawberries, raspberries, or even pineapple for a tropical twist.
Step-by-Step Instructions
Creating Banana Pudding Cheesecake Cones is not only simple but also incredibly fun. Follow these easy steps to bring this creamy, crunchy delight to life.
Preparation
Before you begin mixing and assembling, take a few moments to prepare your ingredients and workspace. Proper preparation ensures a smooth and enjoyable experience.
- Set Up Your Workspace: Clear your kitchen counter and gather all the necessary tools, including a large mixing bowl, an electric mixer, and a piping bag (or a zip-top bag with the corner snipped off for piping).
- Soften the Cream Cheese: Remove the cream cheese from the fridge about 30 minutes before starting. Softened cream cheese blends more easily, creating a smooth and creamy texture.
- Ripen Your Bananas: If your bananas aren’t fully ripe, pop them in a paper bag for a few hours or microwave them briefly to soften. Ripe bananas add a naturally sweet, intense flavor to the cheesecake mixture.
Now that your ingredients are ready, it’s time to mix the magic!
Mixing
This step is where the creamy, dreamy filling comes together. Take your time to blend everything into a luscious mixture.
- Cream the Base: In a large mixing bowl, beat the softened cream cheese using an electric mixer until it’s smooth and lump-free. This step is essential for a creamy texture.
- Add Sweetness and Flavor: Gradually mix in the granulated sugar and vanilla extract, beating until the sugar dissolves and the mixture is light and fluffy.
- Incorporate the Tanginess: Blend in the sour cream for a subtle tang that balances the sweetness of the filling.
- Whip it Up: Slowly pour in the heavy cream while mixing, allowing it to fluff up the texture.
- Fold in the Bananas and Crunch: Gently fold in the banana puree and crushed vanilla wafers using a spatula. The puree adds a fruity sweetness, while the wafers bring a delightful crunch.
Your cheesecake mixture is now silky smooth and ready to be chilled.
Forming and Shaping
The assembly process is where this dessert starts to shine—each cone becomes a fun, edible masterpiece.
- Chill the Filling: Cover the cheesecake mixture with plastic wrap and refrigerate it for about 30 minutes. Chilling helps the filling firm up, making it easier to pipe.
- Prepare the Cones: While the filling chills, stand the waffle cones upright in a cone holder or arrange them carefully on a tray to prevent tipping.
- Fill the Cones: Spoon or pipe the chilled cheesecake filling into each cone, filling them about ¾ full to leave room for toppings.
This step is quick, easy, and sets the stage for the finishing touches.
Finishing Touches
Now for the fun part—adding toppings that make these cones not only delicious but also a feast for the eyes!
- Layer the Toppings: Add a dollop of whipped cream on top of each cone, followed by a few slices of banana. The contrast between the creamy filling and fresh fruit is irresistible.
- Sprinkle Some Crunch: Finish with a sprinkle of additional crushed vanilla wafers. This final layer adds a decorative touch and a bit of crunch with every bite.
- Pro Tip for Perfect Presentation: Assemble the cones just before serving to ensure the toppings and cone stay crisp and fresh.
Serve immediately and watch as your guests are wowed by these delightful desserts!
Why You’ll Love This Recipe
There are so many reasons why Banana Pudding Cheesecake Cones are destined to become your new favorite dessert. Here are a few highlights:
- A Unique Fusion of Flavors: This recipe combines two beloved desserts—banana pudding and cheesecake—into a fun, creative treat. The creamy banana cheesecake filling paired with the crunchy waffle cone creates a perfect harmony of textures and flavors.
- Fun for All Ages: Kids will adore the playful presentation, while adults will appreciate the nostalgic flavors and gourmet twist. It’s a dessert that bridges generations and brings everyone to the table.
- No-Bake Simplicity: Skip the oven and save time with this no-bake recipe. It’s ideal for busy days or hot summer afternoons when you want a cool, refreshing treat.
- Perfect for Any Occasion: Whether you’re celebrating a birthday, hosting a holiday gathering, or simply indulging in a sweet craving, these cones fit every occasion. Plus, they’re portable, making them perfect for parties and picnics.
- Customizable for Every Taste: From swapping out ingredients to adding your own flair, this recipe encourages creativity. Make it your own and share your signature cones with friends and family.
Serving Suggestions
Occasions and Pairings
Banana Pudding Cheesecake Cones are the ultimate treat for any occasion, whether casual or formal. Their whimsical presentation and delightful flavors make them a perfect choice for:
- Brunch Gatherings: Add a sweet and refreshing twist to your next brunch by serving these cones as a dessert or alongside fresh fruit platters and savory dishes.
- Parties and Celebrations: These cones are a hit at birthday parties, baby showers, or holiday gatherings. Their individual servings make them easy to grab and enjoy without extra fuss.
- Festive Treats: Impress guests during festive seasons like Easter, Thanksgiving, or Christmas by pairing these cones with other seasonal desserts.
For a complete indulgence, pair these cones with iced coffee, sweet tea, or sparkling lemonade. The creamy, fruity flavors of the cones balance perfectly with refreshing, light beverages, creating a harmonious dessert experience.
Presentation Ideas
Presentation is key to making these cones stand out. Here are some tips to style them beautifully:
- Use Decorative Cone Holders: Place each cone in a colorful holder or arrange them in a cone stand for an elegant display that also prevents tipping.
- Layer Toppings with Care: Pipe the whipped cream neatly, add thin banana slices, and sprinkle crushed wafers evenly to create a visually appealing contrast of textures and colors.
- Add a Touch of Flair: Garnish with a drizzle of caramel or melted chocolate to take the presentation to the next level.
Your guests will love the thoughtful details that make these cones not only delicious but also a treat for the eyes!
Storage and Reheating
Storage Tips
To keep your Banana Pudding Cheesecake Cones fresh and crisp, it’s important to store the components separately:
- Filling: Transfer the cheesecake mixture to an airtight container and refrigerate for up to 2 days. This ensures the filling stays creamy and doesn’t absorb unwanted flavors.
- Toppings: Keep the banana slices and whipped cream separate to maintain their texture. Squeeze a bit of lemon juice on the banana slices to prevent browning.
- Cones: Store the waffle cones in a cool, dry place to keep them crisp. Avoid refrigerating or exposing them to humidity.
Assembling the cones just before serving will help prevent sogginess and ensure every bite is perfect.
Make-Ahead Instructions
This recipe is ideal for prepping in advance, especially if you’re hosting an event. Here’s how:
- Prepare the Filling: Mix the cheesecake filling and refrigerate it up to a day in advance. Give it a quick stir before piping into the cones.
- Cut the Bananas: Slice the bananas a few hours before serving and store them in an airtight container with a splash of lemon juice to preserve their color.
With everything ready to go, assembling the cones will be a breeze, leaving you more time to enjoy your gathering.
Reheating and Serving
While this dessert is best served chilled, you can slightly warm the cheesecake filling for a creamier texture:
- Let the filling sit at room temperature for 10-15 minutes before assembling.
- Serve immediately after assembling to ensure a perfect balance of chilled creaminess and crisp cones.
Recipe FAQ
Baking or Cooking Tips
- Texture is Key: For a creamy filling, make sure the cream cheese is fully softened before mixing, and whip the heavy cream gently to avoid overbeating.
- Maximum Sweetness: Use ripe bananas for their natural sweetness and bold flavor. If your bananas aren’t ripe enough, mash them with a teaspoon of sugar and let them sit for a few minutes.
These tips ensure that your cones are smooth, flavorful, and perfectly balanced.
Troubleshooting
- Preventing Soggy Cones: To keep the cones crispy, assemble them just before serving. Alternatively, serve the filling and toppings in small bowls alongside the cones, allowing guests to DIY their own desserts.
- Adjusting Sweetness: If the filling is too sweet for your taste, reduce the granulated sugar slightly and let the natural sweetness of the bananas shine.
These simple fixes will help you achieve perfect results every time.
Serving FAQ
- Portion Control: This recipe yields 12 cones, making it ideal for small to medium gatherings. For larger events, simply double the ingredients to ensure everyone gets their own cone.
- Gifting Ideas: Wrap the assembled cones individually in cellophane bags and tie with a ribbon for a thoughtful and delicious party favor. Alternatively, pack the filling, cones, and toppings separately in a decorative box for a DIY dessert kit.
Related Recipes
If you loved this banana-inspired dessert, you might enjoy these other delicious recipes:
- Banana Pancakes Recipe (No Flour): A healthier take on banana pancakes, made without flour.
- Strawberry Banana Peanut Butter Smoothie: A creamy and protein-packed smoothie with banana goodness.
- Marbled Banana Bread: A decadent banana bread with a marbled chocolate swirl.
- Banana Blondies Recipe: Soft and chewy blondies packed with banana flavor.
- Strawberry Cheesecake Dump Cake: An easy dessert combining fruity flavors with creamy cheesecake.
Conclusion
Banana Pudding Cheesecake Cones are a delightful blend of creamy, fruity, and crunchy textures that come together to create a truly unforgettable dessert. From the smooth cheesecake filling infused with ripe bananas to the crisp waffle cone and irresistible toppings, every bite offers a symphony of flavors that’s both comforting and exciting. Whether you’re hosting a party, looking for a quick no-bake treat, or simply craving something unique, this recipe is perfect for any occasion.
Print
Banana Pudding Cheesecake Cones
- Total Time: 20 minutes
- Yield: 12 servings
- Diet: Vegetarian
Description
This playful recipe combines the creamy goodness of cheesecake with the nostalgic flavors of banana pudding, all served in crispy waffle cones. Perfect for parties, celebrations, or a weekend treat, these Banana Pudding Cheesecake Cones are easy to prepare, require no baking, and are guaranteed to impress.
Ingredients
- 8 ounces cream cheese, softened
- 1 cup granulated sugar
- 1 teaspoon vanilla extract
- 1 cup sour cream
- 1 cup heavy cream
- ½ cup banana puree (about 2 ripe bananas)
- ½ cup crushed vanilla wafers
- 12 waffle cones
- 2 bananas, sliced
- Whipped cream, for garnish
- Additional crushed vanilla wafers, for garnish
Instructions
- Beat softened cream cheese in a large bowl until smooth.
- Mix in sugar and vanilla extract until combined.
- Add sour cream and heavy cream, blending until creamy.
- Fold in banana puree and crushed vanilla wafers.
- Chill the mixture for 30 minutes in the refrigerator.
- Pipe or spoon the chilled mixture into waffle cones.
- Top with sliced bananas, whipped cream, and crushed vanilla wafers.
- Serve immediately and enjoy!
Notes
- Assemble cones just before serving to maintain crispness.
- For a gluten-free version, use gluten-free cones and wafers.
- Add caramel drizzle for extra indulgence.
- Prep Time: 20 minutes
- Cook Time: 0 minutes
- Category: Dessert
- Method: No-Bake
- Cuisine: American
Nutrition
- Calories: 350 kcal
- Sugar: 25 g
- Fat: 20 g
- Carbohydrates: 40 g
- Protein: 4 g